Search This Blog
Showing posts with label Nail Polish Layering. Show all posts
Wednesday, August 27, 2014
Rainbow Jelly Nail Look
In all my years as a team lead and trainer, I still can't comprehend why people don't ask questions when they have no clue of what you are asking them to do and to make matters worst, they act like they know it. Yeah!! I don't know what they don't know until I start to sound like a broken record and the job doesn't get done properly, it makes me wanna penguin slap sometimes. Wooo Sahhh! Thank goodness mama taught me better but I guess it doesn't hurt to have a bit of imagination.
Anyways, my nails were bare, I'm annoyed, so I decided to distract myself and have a rainbow party on my nails to make things better. Ain't it pretty!? I love how it turned out.Truth be told, I didn't come up with the idea. I saw this nail look on Pinterest and I knew that I have to try it! It's actually really easy to do.
First, I painted my nail with a dark base. Here I used L'Oreal Extraordinaire Gel Lacque in All Shine on Me. Secondly, I apply a couple layers of Finger Paints Santa's Magic, which is a silver holo glitter.
Next, I dabbed a 2 or 3 different Jelly colors on each nails. I used L'Oreal Miss Pixie, Berry Nice, Jolly Lolly, Mango Mama, and Zoya Frida.
And to complete the look, I sealed the mani with Sally Hansen Big Shiny Top Coat.
Saturday, May 31, 2014
2 Nail Looks - Orange Pink Gradient and Black and Gold Lace
I went to see Maleficent today and thought the movie was quite good! Much better than I expected. I have just a faint memory of the original story. I've never seen the original film but have read the story in book a long time ago when I was a little girl. Without spoiling too much of it, the new movie tells a completely new and different story to the original version but in a good way in my opinion. I think it makes the plot more interesting and sentimental. Angelina Jolie looked incredible and her performance was excellent! So glad to see her back in the big screens. I think she was the perfect actress for this role. Maleficient is wicked, dangerous, and beautiful at the same time. Do check it out if you haven't already.
I've been pampering my nails for the past couple weeks with these manis. I feel so proud of myself!
Currently, what I'm sporting on my nails is this vibrant Orange Pink shimmer gradient look with a few sprinkles of purple glitters. I made use of the new Revlon Electric Chrome Spiderman Collection polishes for these nail looks. This nail look makes me think of a tropical cocktail drink.
Product Used:
- I did 2 coats of Revlon Electrified Web on all my nails.
- Once that dried, I used the sponge technique to create the pink orange gradient by using Revlon Gwen's Crush, focusing it more on around the cuticles.
- I added one coat of Sally Hansen Big Shiny Top Coat.
- I spread a few purple glitters on the top portion of the nail bed using Orly FX Can't Be Tamed.
- I finished off with another coat of Sally Hansen Big Shiny Top Coat.
Last week, I sported this black gold lace pattern on my nails. Initially, I wasn't planning on stamping anything on it but once I got the gold all over my nails, I felt like it was just too much and needed to tame it down so the black was a nice contrast and made the nails look more elegant.
Product Used:
- I started off with one coat of Sally Hansen Triple Strong as my base
- I painted one coat of Revlon 1000 Volts on all my nails.
- I used one of the stamping plate I got from Bundle Monsters (from Amazon.com). It has this lacy pattern that also reminded me of easter egg patterns. With my Konad black special polish, I stamped the pattern all over my nails.
- I finished the look with Sally Hansen Big Shiny top coat.
Sunday, May 18, 2014
Prom Makeup, Nails, Hair, and Accessories
Hello Beautifuls,
Long time no see. I have been granted to take a couple days off work so I'm having a long weekend to relax. Things are busy as usual, we are still short staffed, and I've been putting in extra hours at work which is why my blog has been in the back burner.
I was busy Friday and yesterday prepping for my daughter's prom. I think I was just as excited as they are.
I did my daughter's hair, makeup, and corsage. She did her own nails. I also did her friend's makeup. On top of that, I also played the photographer briefly. Getting two girls ready for prom, especially when you DIY will take you hours. Continue reading for details on the makeup, hair, nails, and accessories. If you'd like to see the photoshoot and additional prom pictures, please visit my other blog HERE.
Vanessa's Makeup
Because her dress doesn't really have much color, I decided to go with fuchsia lips and bright fuchsia roses of the corsage to add a pop of color and contrast. I did a cut crease eye makeup with a dark plum eyeshadow on the crease and sparkly gold eyeshadow on the lids.
What she's wearing:
- Cheeks - Tarte Park Ave Princess bronzer, Estee Lauder Pure Color Cheek Rush X-pose Rose, Sephora + Pantone Color of the year Blush Duo, and NYX Born to Glow Liquid Illuminator.
- Eyes
- LORAC Behind The Scenes eye primer
- MAC paint pot Indian Wood
- Sleek i-Divine Ultra Mattes V2 Villan on the crease with Urban Decay Black Out from Naked 2 palette
- Urban Decay Booty Call (Naked 2) on the brow bone
- Fyrinnae Pixie Epoxy
- ELF Golden mineral eyeshadow mixed with MAC Reflects Gold glitter
- Physicians Formula Eye Booster liquid liner ultra black (upper lash line)
- Flower Easy on the Eyes Long Wear Eyeliner Aubergine (lower lash line)
- Urban Decay Glide-On Shadow Pencil Sin (lower lash line)
- ELF natural false eyelashes
- Illamasqua Cream Eye Shadow Intrude and Anastasia Tinted Brow Gel Espresso on brows
- Lips - Milani Color Statement Lip Liner 08 Fuchsia and Bite Beauty Quince
Hair
For Vanessa's hair, I followed the tutorial below. I'm hopeless when it comes to hair and the video tutorial make it look so easy. Well, for me it was actually harder than it looked. I have yet to master the art of hair braiding. I ended up braiding all her hair. Including the middle section. I guess I didn't do too bad I think.
Vanessa decided to use a black nail polish and do a gold glitter gradient to go with her dress. She used Deborah Lippmann Glitter and Be Gay for this nail look.
Vanessa's Corsage
I purchased black and gold ribbons from Michaels, along with floral wires and a stretchy beaded bracelet. Also, I purchased a bouquet of flowers from the local grocery store. I still find making your own corsage challenging but if you just finagle with it, you can make it work.
Jewelries
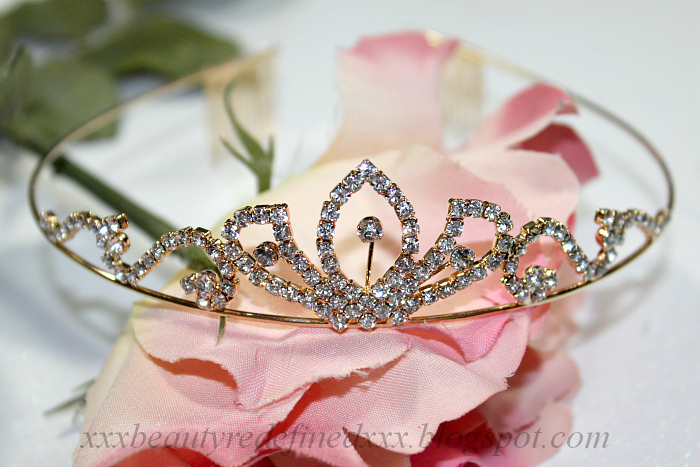
I can't be certain where we purchased the ring. I think it's either Forever 21 or Icing. Otherwise, the earrings ($16.50), bracelets ($14.50) and tiara ($14.50) were all purchased at Icing. Initially, she was reluctant with wearing a tiara but this one is small and cutesy so eventually she was fine with it.
Mindy's hair and Makeup
I did a loose side french braid on the top and secured with a hair clip and she then made some loose curls with the curling iron.
For her makeup, I decided to do a soft smoky eye look with some sparkles on the eyes as well.
What she's wearing:
- Cheeks - Tarte Park Ave Princess bronzer, Milani Baked blush Fantastico Mauve, and NYX Born to Glow Liquid Illuminator.
- Eyes
- LORAC Behind The Scenes eye primer
- Milani ShadowEyez Espresso Line as base
- theBalm Matte Ramirez and Violet from IT Cosmetics Naturally Pretty palette on the crease
- Urban Decay Black Out from Naked 2 palette on the outer V
- Love from IT Cosmetics Naturally Pretty palette on the brow bone
- Fyrinnae Pixie Epoxy
- Fyrinnae Shenanigans on the lids
- Urban Decay 24-7 Glide On eye pencil Black Market on the upper lash line
- Urban Decay 24-7 Glide On eye pencil West on the lower lash line
- Urban Decay Glide-On Shadow Pencil Sin (lower lash line)
- Illamasqua Cream Eye Shadow Intrude and Anastasia Tinted Brow Gel Espresso on brows
- False eyelashes
Whew...I'm done. It was fun getting the girls dolled up. I wanna go see Godzilla now :D
What did you enjoy most about Prom? Did you do hair, nails, and makeup yourself or did you get professional help?
Thursday, March 27, 2014
Revlon Electric Chrome Spider-Man Collection Haul and Swatches
I stopped by Walgreens the other day to pick up some cough medicine for my daughter and looked around the beauty isle as usual. I spotted the new Revlon Electric Chrome Spider-Man collection fully stocked and my jaw just hit the floor, lol. O-M-G look at those preciouses! I was ecstatic! They look so vibrant, glowy, and a bit duochromatic in the bottle. I knew right then and there that I had to get every shade and the funny thing is my silly self ended up getting 2 of the same color without realizing it until after I got home.
They had 3 lipglosses and though they looked really pretty in the bottle, they seem like they'd be sheer so I decided to only get one. I will do a separate post for the lipgloss.
The nail polish collection consists of 6 shades...Most of the shades only required two coats for full opacity. The lighter shades needed 3 coats. The formula isn't the greatest as I find it to apply rather unevenly. It's not too thin or thick; however, it's totally manageable as long as you apply carefully.
I gotta say, the packaging is sick! The gold spider web design on the caps make these look bad ass! I can't wait for the movie to come out.
1000 Volt - shimmery gold with a bit of green in it but isn't really a duochorme. So much prettier in person though. 3 coats.
Electrified Web - bright, shimmery, vibrant orange, shifting from a warm orange to a deeper orange and pink. 2 coats.
Spidey Sense - bright shimmery pinkish red with some warm undertone. Doesn't really shift color but still beautiful. 2 coats.
Gwen's Crush - shimmery bright magenta with subtle blue shimmers. 2 coats. I almost didn't pick up this one since I have a couple similar shade.
Super-Powered is a deep shimmery blue. Super pretty and I probably have a couple similar color to this one.
I'm Electro - dusty light blue with vibrant blue shimmers and a light pink duochrome shift. 3 coats. My favorite one of the collection. If you're only getting one, this should be the one!
I decided to add Sephora Formula X Thunder (glitters) and Out the Door Northern Lights hologram top coat to get this super pretty nail look.
Have you spotted this collection yet? Will you get anything?
Sunday, March 23, 2014
OPI Muppet Most Wanted - Kermit Me To Speak and Let's Do Anything We Want!
The collection has been out for a couple weeks now I think but so far these are the only two polishes from the collection that I was interested in. You can find them at Ulta and Sally Beauty Supply, though I believe the quantity at Sally is very limited.
Kermit Me To Speak is a shimmery violet bronze duochrome. You could probably get a way with just 2 coats but I prefer to use 3 for good measure. The formula is not too thick or to thin and dries fairly quickly. It does show a bit of brush stroke but if you apply carefully and apply a top coat over it, it's not that noticeable. I find the color shift fairly strong. Very beautiful color.
![]() |
Kermit Me To Speak Vs Next Stop...The Bikini Zone |
On the left two finger nails I have Kermit Me to Speak and on the right two fingers I have Next Stop...The Bikini Zone. They are very similar in a way yet not quite the same either.
NSTBZ has pale gold shimmers, which seem to add more pizzazz to the overall look. It is also a bit more sheer. The duochrome shift is not as strong as KMTS and less bronzy and cooler.
Let's Do Anything We Want has squared white glitters and small pink rose glitters and small round white glitters. Very fun glitter I think. The clear base is slightly on the thick though still pretty easy to use and picks up a fair amount of glitters. I did have some difficulty getting the squared white glitters and had to fish for them but other than that, I really like it.
Here I have Let's Do Anything We Want over Kermit Me To Speak and I find that the two actually make a lovely combo. I am currently wearing this combo on my nails for the week. It's super cute and girly.
Subscribe to:
Posts (Atom)